To synchronize audio and video using a clapper board, first label the scene and take, then hold it in front of the camera. When you clap sharply, note the exact frame where the clapper closes and the loud sound happens. During editing, match that visual cue with the corresponding peak in the audio waveform. Paying close attention guarantees tight sync, and with further tips, you’ll master precise alignment for professional results.
Key Takeaways
- Use the clapper board to create a visual cue by closing it sharply at the start of each take.
- Record the corresponding sharp sound of the clapper to serve as an audio reference point.
- Transfer footage and audio to editing software, noting the exact frame where the clapper closes.
- Match the visual of the closed clapper with the audio peak during editing for precise synchronization.
- Utilize timecode, frame counts, or auto-sync tools to refine and verify accurate time alignment.
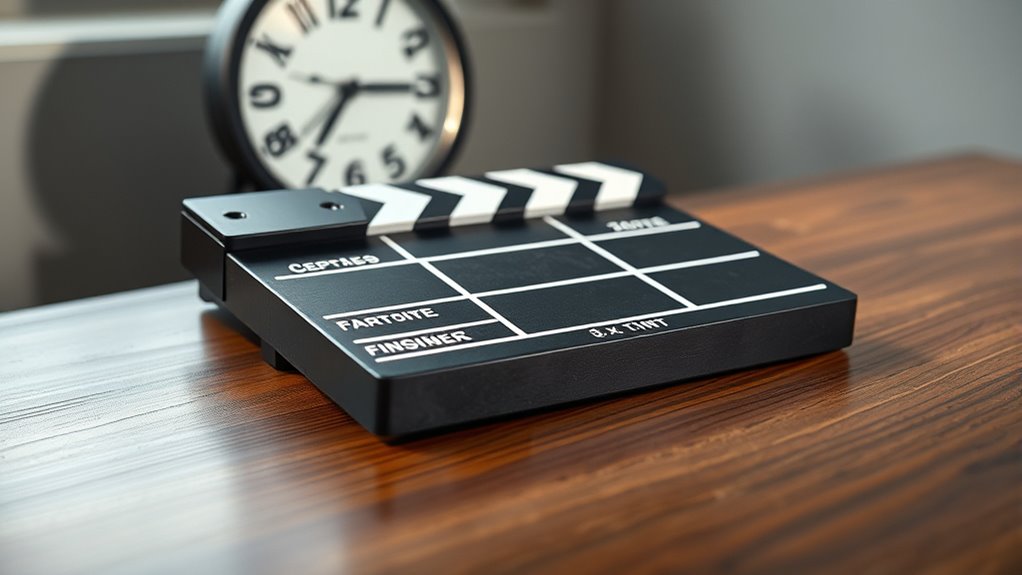
Have you ever wondered how filmmakers perfectly synchronize audio and video during editing? It all begins with understanding the importance of accurate timing, which ensures your final footage looks seamless and professional. One of the most effective methods for achieving precise audio synchronization is using a film slate, commonly known as a clapper board. This simple tool combines visual and auditory cues that make matching sound to picture much easier.
When you’re on set, the first step is to clearly label your film slate with key information—scene, take, date, and production details. As filming begins, you’ll clap the board’s hinged top down sharply, creating a distinct visual cue and a sharp slap sound. This synchronized action is the cornerstone of effective film slate usage because it provides a clear point of reference during editing. The visual of the clapper closing and the sound of the slap are captured by your camera and microphone respectively, creating a perfect marker for aligning audio and video.
Once filming wraps, you’ll transfer your footage and audio recordings to your editing software. Here’s where audio synchronization takes center stage. You’ll look for the visual cue of the clapper board closing—an unmistakable frame—and match it with the corresponding peak in your audio track, the sharp sound of the clap. Many editing programs offer automatic syncing features that can detect these peaks, but understanding the manual process helps guarantee precision, especially in complex scenes or when the automatic tools falter. Additionally, using timecode or frame count can further enhance synchronization accuracy if available on your equipment.
Match the visual clapper closing with the audio peak for precise synchronization.
To make your synchronization even more accurate, pay attention to the timecode or frame count if your camera and audio recorder support it. When possible, record audio separately on a dedicated recorder, which often yields higher quality and less camera noise. This setup makes it easier to identify the exact frame where the clap occurred, ensuring your audio aligns perfectly with the visual cue. Remember, small discrepancies can lead to noticeable lip-sync issues or awkward audio misalignments, so take your time to double-check your sync points.

Dunzy 11 Pcs Ghost Hunting Equipment Kit Include Ghost Radio, Electromagnetic Paranormal Radiation Detector, EVP Recorder, UV Flashlight 2 LED Light up Cat Balls Etc(3 in 1 Emf Meter)
- Complete Ghost Hunting Kit: Includes EMF meter, EVP recorder, UV flashlight, and more
- Easy Ghost Communication: Lightweight, sensitive device for ghost interaction
- High-Sensitivity EMF Detector: Measures electromagnetic fields from 5 Hz to 3500 MHz
As an affiliate, we earn on qualifying purchases.
Frequently Asked Questions
Can Time Sync Be Performed Without a Clapper Board?
Yes, you can perform time sync without a clapper board. You just need to match audio delay and frame timing manually. Use software to align the audio with the video by identifying a clear sync point, like a sharp sound or visual cue. Once you find the reference point, adjust the audio delay and ensure frame matching so everything aligns perfectly, even without a physical clapper board.
What Are Common Mistakes During Time Synchronization?
Ever feel like your footage is playing hide and seek with your audio? You might be making common mistakes like neglecting to account for camera delay or overlooking audio mismatch issues. These slip-ups happen when you don’t double-check your sync points or ignore the timecode. To avoid confusion, always verify your audio and video align perfectly, and remember, even a tiny delay can throw off your entire project.
How Does Lighting Affect Clapper Board Visibility?
Lighting substantially impacts clapper board visibility by affecting contrast and clarity. If the area is too dim, you’ll struggle to see the markings clearly, causing delays during the shoot. Bright, even lighting enhances visibility, ensuring the numbers and details are easy to read quickly. Proper lighting helps prevent mistakes, keeps the workflow smooth, and ensures the clapper board’s information is captured accurately in the footage.
Are Digital Clapper Boards More Effective Than Traditional Ones?
Digital clapper boards are more effective than traditional ones because they offer better digital integration and synchronization accuracy. You can easily sync audio and video in post-production, reducing errors and saving time. Their clear digital displays make it easier to read under various lighting conditions, ensuring your footage stays aligned. Overall, digital boards streamline your workflow, improve precision, and enhance your production quality, making them a smart upgrade from traditional clapper boards.
How Do You Troubleshoot Sync Issues in Post-Production?
To troubleshoot sync issues in post-production, start by checking for audio mismatch and frame rate errors. Make sure your project settings match the camera’s frame rate, and verify that the audio and video files are correctly aligned. Use waveform analysis to identify sync discrepancies, then adjust clips manually or with software tools. Regularly reviewing your footage during editing helps catch and fix sync problems early, ensuring smooth playback.
Conclusion
As you master time sync and clapper boards, you realize it’s no coincidence how precision brings scenes together seamlessly. Just like life’s small moments align unexpectedly, these tools remind you that clarity and timing can transform chaos into harmony. When you hit that clapper, it’s a reminder that timing isn’t just technical—it’s a reflection of life’s delicate dance. Embrace the coincidence; it’s where creativity and timing intertwine perfectly.