
To set up infrared video effectively, start by choosing key areas like entry points and driveways, and position your camera about 8-10 feet high with a slight downward angle. Make sure the camera has a clear line of sight, avoiding bright lights or reflective surfaces. Adjust its angle for ideal night vision and test the footage. Proper placement enhances IR performance and reduces issues, so follow these steps closely—by continuing, you’ll discover how to perfect your setup even further.
Key Takeaways
- Identify optimal outdoor locations with unobstructed views for camera placement, considering entry points and driveways.
- Mount cameras securely at 8-10 feet height, angled slightly downward to maximize coverage and detail.
- Test camera view and infrared night vision using live feed, adjusting angles to eliminate blind spots and glare.
- Ensure environmental factors like fog, rain, or snow won’t impair infrared effectiveness during installation.
- Review nighttime footage post-installation, fine-tuning camera angles if image quality or IR performance needs improvement.
Are you ready to set up infrared video for clear night surveillance? Achieving effective night vision depends heavily on proper camera placement. Before you start mounting your infrared camera, take some time to plan where it will have the best coverage. Think about the areas you want to monitor most, such as entry points, driveways, or backyard zones. The goal is to position the camera where it can capture clear images even in complete darkness without obstructions or glare from nearby lights.
Begin by selecting a height that provides a broad field of view while still capturing detailed images. Usually, mounting the camera around 8 to 10 feet high strikes a good balance—it’s high enough to prevent tampering but low enough to capture clear facial features or license plates. Ensure the camera is angled slightly downward to maximize coverage of the target area. When deciding on camera placement, avoid pointing directly at bright lights or reflective surfaces, as these can cause glare and interfere with night vision clarity. Instead, position the camera where ambient lighting or infrared illumination can work together to enhance visibility.
Next, consider the environment. If there are trees, bushes, or other objects that could block the infrared light, adjust the placement accordingly to maintain an unobstructed line of sight. Remember, infrared cameras rely on night vision technology, so the placement must optimize infrared light reflection and reception. Avoid locations prone to heavy fog, rain, or snow, which can diminish infrared effectiveness. If you’re installing the camera outdoors, ensure it’s weatherproof and mounted securely to withstand wind or vandalism.
Once you’ve decided on the best spot, double-check the camera’s angle. Use a ladder if necessary, and test the view with the camera’s live feed or app. Look for gaps or blind spots and make adjustments as needed. When positioning the camera, keep in mind that proper camera placement not only improves night vision but also helps reduce false alarms caused by moving objects or animals. Additionally, understanding the Basics of Soaring and Gliding can inspire creative ideas for mounting angles and elevation to achieve optimal coverage.
Finally, after mounting, turn on the infrared feature and review footage during nighttime hours. Confirm that the camera captures sharp, clear images with good contrast and minimal distortion. If the images aren’t satisfactory, revisit your camera placement, adjusting angles or height until you achieve the desired night vision clarity. Remember, effective camera placement is key to making the most of infrared technology and ensuring your surveillance system provides reliable, high-quality night footage.
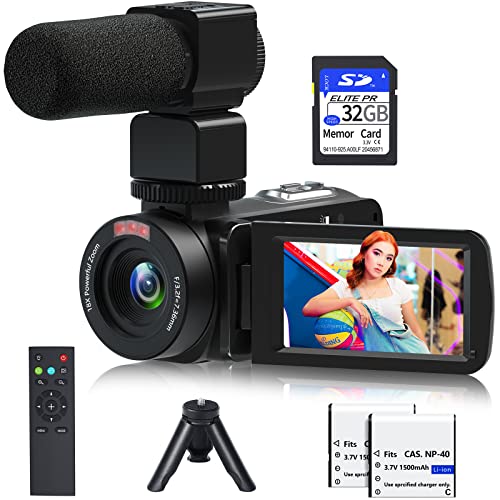
Video Camera, 1080P 30MP Camcorder IR Night Vision Vlogging Camera for YouTube,3.0" LCD Screen 18X Digital Zoom Recorder Camera with Remote Control, Microphone, Mini Tripod, 2 Battries, 32GB SD Card
【Video Camera Camcorder】--This 30FPS video camera recorder movies in 1080P resolution.It includes remote control, microphone, mini tripod, 2...
As an affiliate, we earn on qualifying purchases.
Frequently Asked Questions
What Are the Best Infrared Camera Brands for Beginners?
For beginners exploring infrared technology, brands like FLIR, Fluke, and Seek Thermal stand out. They offer user-friendly cameras with clear specifications, making it easy to learn and experiment. These brands provide reliable infrared cameras that balance affordability and quality, helping you understand essential camera specifications like resolution and thermal sensitivity. You’ll find their devices ideal for gaining hands-on experience, ensuring a smooth start in your infrared video journey.
How Do I Troubleshoot Poor Image Quality in Infrared Videos?
To troubleshoot poor infrared video quality, start by checking infrared image calibration to make certain accurate temperature readings. Adjust your camera’s focus and settings for ideal image clarity. Troubleshoot thermal noise by reducing gain or exposure time, and make sure your lens is clean and free of smudges. If issues persist, update firmware or try a different power source. Proper calibration and noise management are key to clear, detailed infrared videos.
Can Infrared Cameras Be Used Outdoors in Harsh Weather Conditions?
Yes, you can use infrared cameras outdoors in harsh weather, but make sure they’re protected. You should choose models with weatherproof housing to withstand rain, snow, and dust. Also, connect them to an outdoor power supply to maintain reliable operation. Proper installation in a sheltered location can further improve performance, so always check the camera’s specifications for weather resistance and power options before deployment.
What Is the Optimal Placement Height for Infrared Cameras?
You should mount infrared cameras at a height between 8 to 12 feet for ideal coverage. This height balances good camera mounting angles, reducing blind spots while avoiding obstructions. Consider lighting conditions, as infrared cameras perform best with minimal glare or direct light sources nearby. Guarantee the camera’s field of view is clear, and angle it slightly downward to maximize image clarity and security coverage.
How Do I Ensure My Infrared Setup Complies With Privacy Laws?
You should review privacy regulations and legal considerations before installing your infrared cameras. Make certain your setup doesn’t infringe on private spaces or capture more than necessary, and clearly inform affected individuals about surveillance. Keep records of your compliance efforts, and consider consulting legal experts to verify adherence. By proactively addressing privacy laws, you protect yourself from potential legal issues and maintain ethical surveillance practices.

VETEK Video Camera 8k Camcorder 48MP UHD WiFi IR Night Vision Vlogging Camera for YouTube, 18X Digital Zoom 3.0“ LCD Screen Digital Camera with Microphone, 32G SD Card, Remote Control and 2 Batteries
【8K 48MP Video Camera】It adopts for newest upgraded sensor.This vlog camera max supports 8K(7680X4320)15fps video resolution,(It also supports...
As an affiliate, we earn on qualifying purchases.
Conclusion
Think of your infrared setup as planting a seed. With patience and attention to detail, you nurture it, and soon it blossoms into clear, revealing footage. Each step you take is like watering and caring for your plant, ensuring it grows strong and vibrant. Remember, precision and care transform a simple seed into a powerful tool, illuminating what was once unseen. Keep nurturing your skills, and your infrared video setup will flourish beyond expectations.

Video Camera, Full HD 1080P 30MP Camcorder, Vlogging Camera for YouTube with Infrared Night Vision, 18X Digital Zoom 3.0“ LCD Screen Digital Camera, Video Recorder with Remote Control and Battery
【Full HD 1080P 24MP Video Camcorder】This video camera supports up to 1080P video resolution and 24.0MP image resolution....
As an affiliate, we earn on qualifying purchases.

ORDRO Camcorders HDV-V12 HD 1080P Video Camera Recorder Infrared Night Vision Camera Camcorders with 16G Memory Card and 2 Batteries
1080P Video camera: 1920x1080P (FHD) resolution, up to 30.0 mega pixels. 3.0 inches TFT-LCD screen (270 degrees rotation)....
As an affiliate, we earn on qualifying purchases.