
To sync audio and video using a clapper board, start by holding the board steady and giving a sharp clap that creates a clear audio spike and visual cue. Record the scene, ensuring both are captured clearly. In editing, locate the spike in the audio waveform and match it to the visual cue of the clapper closing. Drag the tracks to align perfectly. Continuing with detailed steps will help you master precise synchronization every time.
Key Takeaways
- Record a clear, loud clap with the clapper board at the start of each take, ensuring both visual and audio cues are captured.
- Keep the clapper board steady until the clap is complete to prevent misalignment.
- Import footage and audio into editing software, then locate the audio spike and visual cue.
- Align the audio spike with the visual cue in the timeline for precise synchronization.
- Play back the synchronized clips to verify perfect audio-visual sync before finalizing the edit.

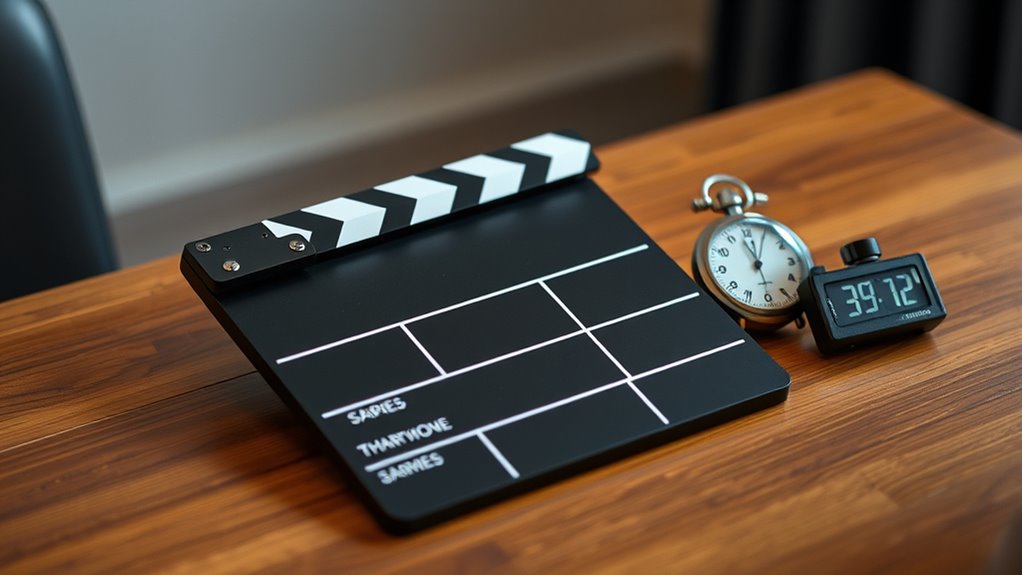
When filming a scene, accurate time synchronization between audio and video is vital for seamless editing. Without it, your final product can feel disjointed, forcing editors to spend extra time trying to align sounds with visuals. This is where understanding film editing and sound synchronization becomes essential. A reliable method to achieve this is by using a clapper board, which acts as a visual and auditory cue to help you synchronize footage efficiently.
The first step is to position your clapper board at the start of each take. Hold it firmly in front of the camera lens, making sure it’s clearly visible. When you’re ready to roll, give the clapper a loud clap with a sharp, definitive sound. This creates a distinct spike in your audio track and a clear visual cue in your video footage. During editing, you’ll look for this visual cue— the clapper board closing—and match it with the corresponding spike in your audio waveform. This process simplifies sound synchronization, making your editing smoother and more precise.
To guarantee the best results, pay attention to the clarity of the clapper board’s clap. The sound should be sharp and distinct, avoiding muffled or soft claps that could be difficult to identify later. Also, make sure the clapper board remains steady until the clap is complete, so the visual cue is clear and easy to spot. When recording, keep your camera and microphone rolling smoothly, capturing both the visual cue and the audio spike in real-time. This consistency helps prevent any discrepancies that could complicate the synchronization process later on. Additionally, understanding Vetted products can help you select reliable equipment for your filming needs.
Ensure the clapper’s clap is clear and steady for easy synchronization during editing.
During post-production, import all your footage and audio files into your editing software. Locate the spike in the audio waveform that corresponds to the clapper board’s clap. Then, find the visual cue of the board closing in your video. Drag the audio or video track so that the spike aligns perfectly with the visual cue. Once synchronized, you can proceed with film editing, confident that your audio and video are in harmony. This method saves time, reduces frustration, and guarantees a professional-looking final product.

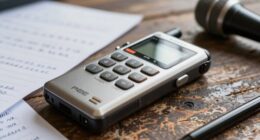
Digital Voice Recorder 16GB Voice Recorder with Playback for Lectures - USB Rechargeable Dictaphone Upgraded Small Tape Recorder Device
【Simple Operation】- switch on your voice recorder, one button for recording. press the "REC", start the recording, press...
As an affiliate, we earn on qualifying purchases.
Frequently Asked Questions
What Are Common Mistakes When Syncing Time With Clapper Boards?
You often face mistakes like not aligning the clapper sound precisely with the start of the action, leading to audio mismatch. Timing inaccuracies happen when you forget to check the slate count or don’t clearly mark the sync point. These errors make editing harder and can cause synchronization issues later. Always double-check your clapper snap and verify it matches the audio cue to avoid these common pitfalls.
How Do Different Clapper Board Types Affect Time Synchronization?
Different clapper board types impact time synchronization based on their clapper design and material durability. You’ll find that traditional wooden boards offer reliability but can be less durable, potentially causing misalignment. Plastic or metal boards often have more precise clapper design, guaranteeing consistent movement. Choosing a sturdy, well-designed clapper board helps maintain accurate time sync, reducing errors during filming. Always guarantee your clapper’s design and material suit your production needs for optimal results.
Can Digital Time Sync Tools Replace Traditional Clapper Boards?
Yes, digital time sync tools can replace traditional clapper boards, but they often lack the visual cues needed for precise audio synchronization. While they streamline the process, they might miss the clear, immediate signal a clapper provides. You want accuracy, clarity, and confidence in syncing audio and visuals. Digital tools help, but don’t overlook the value of a traditional clapper’s immediate, unmistakable cue for perfect synchronization.
What Are the Best Practices for Troubleshooting Sync Issues?
When troubleshooting sync issues, start by checking for audio delay and ensuring your equipment is properly calibrated. You should verify that your camera and audio devices are synchronized with the time code or digital time sync tools. If delays persist, recalibrate your equipment, update firmware, and test with different cables or connections. Consistently monitor audio and video sync during recording to catch issues early and avoid post-production headaches.
How Does Lighting Impact the Effectiveness of Clapper Board Cues?
Lighting substantially impacts how clearly you see clapper board cues, especially in varying lighting conditions. If the scene is too dark or overly bright, camera exposure can obscure the clapper’s marks, making synchronization harder. You might notice that poor lighting causes the cues to blend into the background or become hard to read. To guarantee effective cues, control lighting carefully, maintaining consistent brightness to optimize camera exposure and keep the clapper’s markings sharp and visible.

Olympus WS-883 Digital Voice Recorder, Linear PCM/MP3 Recording Formats, USB-A Battery Charging, True Stereo Microphones, Low-Cut Filter and 8GB Built-in Memory (Black)
Linear PCM/MP3 Recording Formats
As an affiliate, we earn on qualifying purchases.
Conclusion
By mastering time sync and clapper boards, you can guarantee seamless editing and clear footage. Think of the clapper board like a visual anchor, confirming your audio and video align perfectly. This technique turns complex editing theories into simple, visual tools, making post-production smoother. When you use these methods, you’re not just following a process—you’re visually confirming your work’s accuracy, transforming abstract ideas into concrete, easily understandable results.
128GB Digital Voice Recorder for Lectures Meetings - EVIDA 9296 Hours Voice Activated Recording Device Audio Recorder with Playback,Password
Clear PCM Recording: Adopts upgraded noise cancelling microphone with professional recording chip. Capture 1536Kbps premium quality sound. Voice...
As an affiliate, we earn on qualifying purchases.

Sony ICD-PX370 Mono Digital Voice Recorder with Built-In USB Voice Recorder,black
Record MP3 Audio quickly and easily
As an affiliate, we earn on qualifying purchases.