
To guarantee redundancy in audio recording, start by placing your microphone close to the sound source, adjusting angles for clarity. Use multiple microphones to back up your recordings and capture different perspectives. Record several takes and layers of each part to choose the best performance and create richer sounds. Always back up your files immediately to protect against data loss, and monitor your recordings in real-time for issues. Keep exploring these steps for more detailed guidance.
Key Takeaways
- Use multiple microphones to record the same source simultaneously for backup and flexibility.
- Capture multiple takes and layers of each part to ensure options during editing.
- Save raw recordings immediately to separate drives or cloud storage to prevent data loss.
- Monitor recordings in real-time with headphones to detect and address issues early.
- Maintain organized backup copies of all recordings throughout the production process.
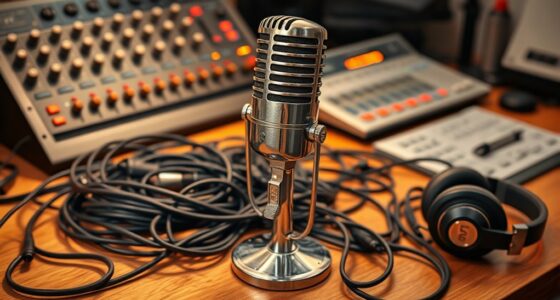
Redundancy in audio recording is a essential practice to guarantee your recordings remain intact and usable, even if technical issues occur. One of the most effective ways to achieve this is by carefully considering microphone placement. Proper microphone placement ensures that you capture clear, high-quality audio from the start, reducing the need for extensive editing later. Position your microphone close to the sound source to maximize clarity and minimize background noise. For vocals, keep the mic about six to twelve inches away, slightly off-axis to avoid plosive sounds. For instruments, experiment with angles and distances to find the sweet spot that best captures the tone without picking up unwanted noise. Using multiple microphones can also be a smart move, especially in complex recordings. This way, if one microphone picks up a problem—like a sudden noise or a phase issue—you have a backup to fall back on, maintaining the integrity of your recording.
Careful microphone placement and multiple takes safeguard your recordings against technical issues.
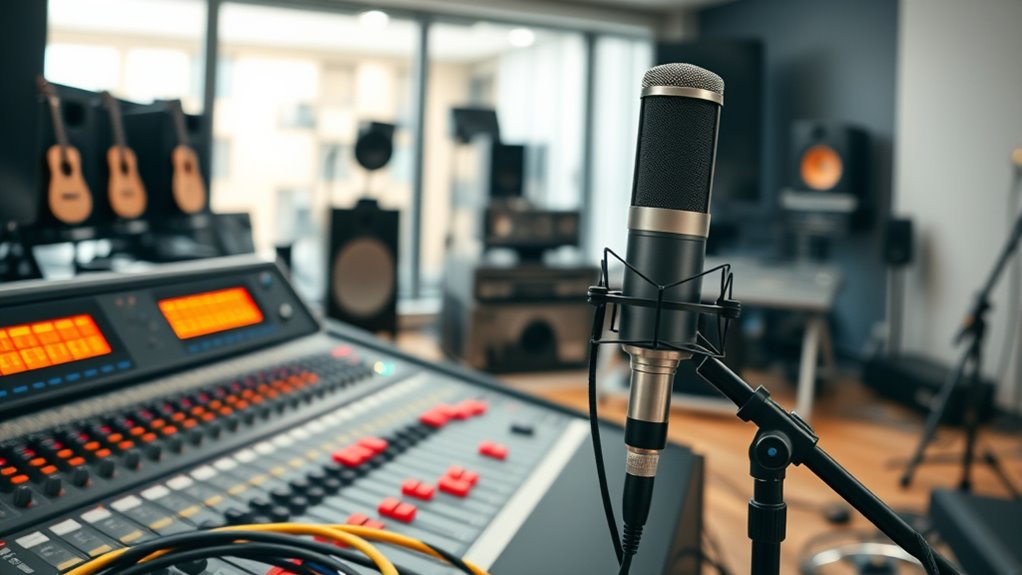
In addition to strategic microphone placement, employing audio editing techniques can further enhance your redundancy. After recording, don’t rely solely on a single take; instead, create multiple takes or layers of the same part. This allows you to select the best version or even combine elements from different takes to improve overall sound quality. When editing, ensure you use non-destructive audio editing techniques, so original recordings remain untouched. This way, if something goes wrong during editing, you can always revert to the original files. Additionally, consider creating backup copies of your raw recordings immediately after each session. Store these backups on separate drives or cloud services to safeguard against hardware failures.
Another essential aspect of redundancy is monitoring your recordings in real-time. Use headphones with good isolation to catch issues as they happen. If you notice a problem—like static, clipping, or unexpected noise—you can pause and troubleshoot immediately, preventing flawed recordings from becoming part of your final product. This proactive approach minimizes the risk of losing valuable material and ensures that your final mix is as clean as possible.
Ultimately, combining thoughtful microphone placement, multiple takes, careful editing techniques, and vigilant monitoring creates a robust safety net. These steps work together to prevent data loss, reduce technical errors, and produce high-quality recordings. When you prioritize redundancy in your audio workflow, you’re protecting your work against unforeseen issues, making your recording process more reliable and your final product more professional.

MyDeal Products VisiGHOST UV Ultraviolet 9 LED Blacklight Pocket Flashlight WITH BATTERIES for Paranormal Research on Ghosts, Spirits, Entities and More! Includes Strap and Carabiner Keychain
INCLUDES 3 x AAA batteries so you can start searching right out of the box! Just remove the...
As an affiliate, we earn on qualifying purchases.
Frequently Asked Questions
What Are the Best Tools for Implementing Redundancy in Recordings?
You should use tools like backup microphones and duplicated tracks to implement redundancy effectively. Backup microphones guarantee you capture audio even if the main mic fails, while duplicated tracks provide a safety net during editing, allowing you to compare and select the best takes. Digital audio workstations like Pro Tools or Ableton Live make it easy to create and manage duplicated tracks, ensuring your recordings stay intact and reliable.
How Does Redundancy Impact Overall Recording Quality?
Redundancy considerably improves your recording quality by ensuring backup strategies are in place, preventing data loss, and enabling error correction. When you implement redundancy, you catch and fix issues early, maintaining clarity and consistency. This proactive approach minimizes risks caused by hardware failures or accidental errors. As a result, your recordings stay high-quality, reliable, and professional, giving you confidence that your work is preserved and easily recoverable at any time.
Can Redundancy Techniques Be Automated During Recording Sessions?
Yes, you can automate redundancy techniques during recording sessions, but automation challenges exist. You might face issues integrating these processes seamlessly into your workflow, requiring specialized software or hardware. To guarantee smooth operation, plan ahead, and test your setup thoroughly. Automating redundancy helps protect your recordings from errors or failures, but careful workflow integration is key to making it effective without disrupting your session.
What Are Common Mistakes When Setting up Audio Redundancy?
You often make mistakes when setting up audio redundancy by overlooking monitoring errors and equipment misconfigurations. Make certain your monitoring systems are correctly calibrated and functioning properly to catch issues early. Double-check all connections, settings, and backups before recording. Avoid rushing the setup process, and test your redundancy setup thoroughly to prevent sound dropouts or data loss. Properly configuring your equipment reduces the chance of costly mistakes during critical recording sessions.
How Does Redundancy Differ Between Digital and Analog Recordings?
You might think redundancy is the same for digital and analog recordings, but it’s not. Digital systems use error correction and backups to guarantee data integrity, making redundancy more automated and reliable. Analog recordings rely on physical backups or multiple tapes, which require manual intervention. This difference impacts how you plan for redundancy, emphasizing digital’s focus on error correction and digital data integrity, compared to analog’s physical redundancy.

Dunzy 6 Pcs Ghost Hunting Equipment Kit Include 1 Emf Meter 1 UV Flashlight and 4 LED Light up Pet Cat Ball Ghost Investigation Paranormal Equipment for Home Office Inspections Gifts(Strong Light)
Ghost Hunting Equipment Set: this ghost hunting equipment kit includes 1 EMF Meter, 1 UV flashlight and 4...
As an affiliate, we earn on qualifying purchases.
Conclusion
Think of redundancy in audio recording as the safety net beneath a tightrope walker—you might glide effortlessly, but that extra layer guarantees you won’t fall if one line falters. Embracing these backups transforms your project into a sturdy bridge, resilient against unexpected slips. By weaving redundancy into your process, you create a masterpiece that withstands the test of time and technical glitches, turning your recording journey into a confident walk across a well-anchored path.

Dunzy 4 Pcs Ghost Hunting Equipment Kit Include 1 EVP Voice Recorder 8 Gb 1 UV Flashlight 2 LED Light up Cat Balls Ghost Investigation Paranormal Equipment for Home Outdoor Inspection(Black,Classic)
A Comprehensive Package: the comprehensive ghost hunting equipment kit comprises of 1 pcs voice recorder, 2 pcs cat...
As an affiliate, we earn on qualifying purchases.

Dunzy Ghost Hunting UV Flashlight, Ghost Hunting Equipment, 51 LED Light Handheld Black Light for Investigation Paranormal Equipment for Home Office Outdoor Inspections Gifts
UV Flashlight: you'll receive a UV flashlight to enhance your ghost-hunting experience; This indispensable tool helps you uncover...
As an affiliate, we earn on qualifying purchases.